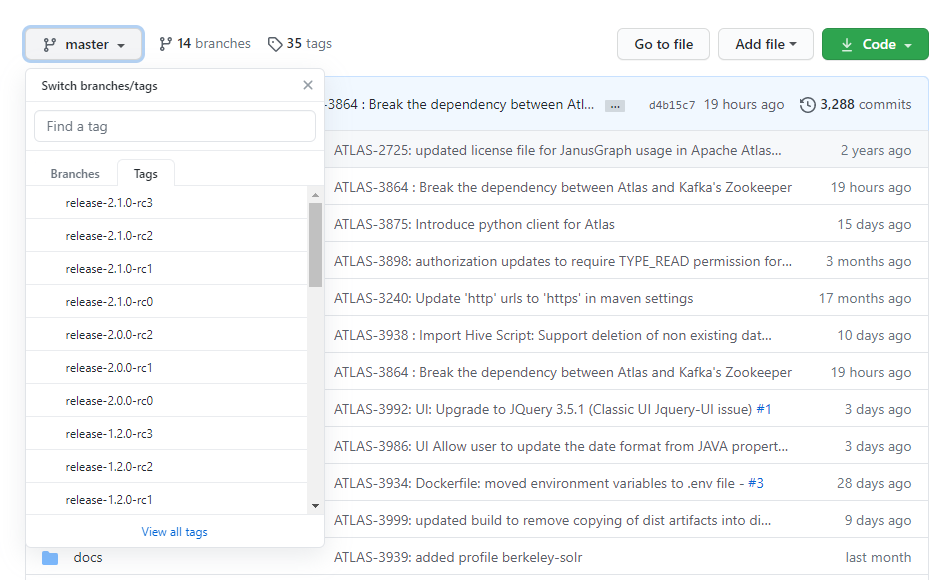
https://github.com/apache/atlas (github 拉取对应分支代码)
本次部署所使用版本为2.1-rc3
在编译前确定好所使用外置组件的版本,以免出现版本不兼容问题
当前atlas所依赖组件版本于atlas源码根目录pom.xml中查看
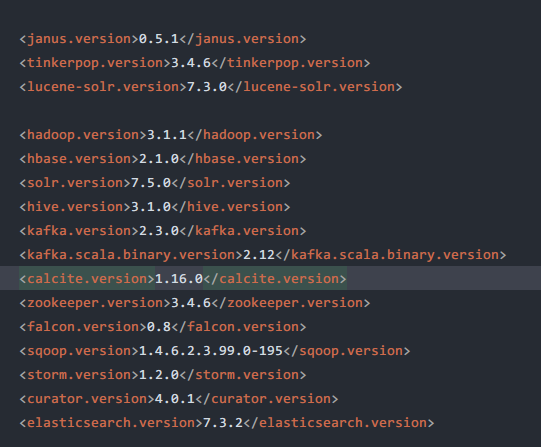
测试所使用的elasticsearch版本为7.3.2(本次测试使用elasticsearch替代solr),kafka为2.12-2.3.0,hbase为2.1.0+cdh6.2.1,zookeeper为3.4.6
1)building atlas(构建atlas):
mvn clean -DskipTests install
2)package atlas(打包atlas):
mvn clean -DskipTests package -Pdist
(注:如需打包入内嵌组件可在后缀加上embedded-组件名 ,示例 : mvn clean -DskipTests package -Pdist,embedded-hbase-solr)
完成后会生成如下包(windows端编译)
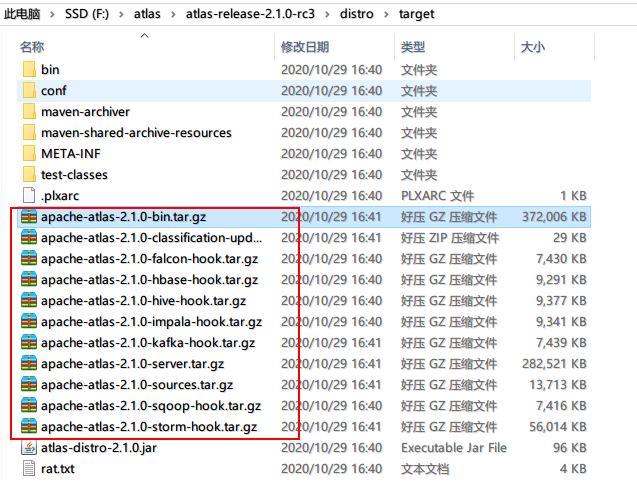
编译完成后将apache-atlas-${project.version}-bin.tar.gz 上传至部署机器
tar -xzvf apache-atlas-${project.version}-bin.tar.gz 解压至对应目录
部署机器所需前置步骤:
1)hosts中配置相关主机名映射。
2)确认janusGraph对应组件版本是否兼容(hbase以及elasticsearch)。
3)相关主机能否ping通。
一、解压后进入conf目录下atlas-application.properties 编辑对应配置项
1)修改图库索引为elasticsearch
此处图库索引由默认solr修改为elasticsearch
# Graph Search Index
atlas.graph.index.search.backend=elasticsearch
注释掉solr相关配置项
配置elasticsearch相关项(此处测试ES所使用双节点)
atlas.graph.index.search.hostname=esnode1,esnode2
atlas.graph.index.search.elasticsearch.client-only=true
2)Hbase相关配置
atlas.graph.storage.backend=hbase2
atlas.graph.storage.hbase.table=apache_atlas_janus
#Hbase
#For standalone mode , specify localhost
#for distributed mode, specify zookeeper quorum here
atlas.graph.storage.hostname=node1:2181,node2:2181,node3:2181
atlas.graph.storage.hbase.regions-per-server=1
atlas.graph.storage.lock.wait-time=10000
#########  Entity Audit Configs  #########
atlas.audit.hbase.tablename=apache_atlas_entity_audit
<a
href="http://atlas.audit.zookeeper.session.timeout.ms/">atlas.audit.zookeeper.session.timeout.ms</a>=1000
atlas.audit.hbase.zookeeper.quorum=node1:2181,node2:2181,node3:2181
3)kafka相关配置
atlas.notification.embedded=false
atlas.kafka.data=/home/service/apache-atlas-2.1.0/data/kafka
atlas.kafka.zookeeper.connect=node1:2181,node2:2181,node3:2181
atlas.kafka.bootstrap.servers=node1:9092,node2:9092,node3:9092
<a href="http://atlas.kafka.zookeeper.session.timeout.ms/">atlas.kafka.zookeeper.session.timeout.ms</a>=400
<a href="http://atlas.kafka.zookeeper.connection.timeout.ms/">atlas.kafka.zookeeper.connection.timeout.ms</a>=200
<a href="http://atlas.kafka.zookeeper.sync.time.ms/">atlas.kafka.zookeeper.sync.time.ms</a>=20
<a href="http://atlas.kafka.auto.commit.interval.ms/">atlas.kafka.auto.commit.interval.ms</a>=1000
<a href="http://atlas.kafka.hook.group.id/">atlas.kafka.hook.group.id</a>=atlas
atlas.kafka.enable.auto.commit=false
atlas.kafka.auto.offset.reset=earliest
<a href="http://atlas.kafka.session.timeout.ms/">atlas.kafka.session.timeout.ms</a>=30000
atlas.kafka.offsets.topic.replication.factor=1
<a href="http://atlas.kafka.poll.timeout.ms/">atlas.kafka.poll.timeout.ms</a>=1000

atlas.notification.create.topics=true
atlas.notification.replicas=1
atlas.notification.topics=ATLAS_HOOK,ATLAS_ENTITIES
atlas.notification.log.failed.messages=true
atlas.notification.consumer.retry.interval=500
atlas.notification.hook.retry.interval=1000
4)atlas HA相关配置
#########  High Availability Configuration ########
atlas.server.ha.enabled=true
#### Enabled the configs below as per need if HA is enabled #####
atlas.server.ids=id1,id2
atlas.server.address.id1=hostname1:21000
atlas.server.address.id1=hostname2:21000
atlas.server.ha.zookeeper.connect=node1:2181,node2:2181,node3:2181
<a href="http://atlas.server.ha.zookeeper.retry.sleeptime.ms/">atlas.server.ha.zookeeper.retry.sleeptime.ms</a>=1000
atlas.server.ha.zookeeper.num.retries=3
<a href="http://atlas.server.ha.zookeeper.session.timeout.ms/">atlas.server.ha.zookeeper.session.timeout.ms</a>=20000
## if ACLs need to be set on the created nodes, uncomment these lines and set the values ##
#atlas.server.ha.zookeeper.acl=<scheme>:<id>
#atlas.server.ha.zookeeper.auth=<scheme>:<authinfo>
主机和从机配置项修改为对应hostname
#########  Server Properties  #########
atlas.rest.address=<a href="http://10-177-204-71.lineage-atlas.dgtest01:21000/">hostname:21000</a>
# If enabled and set to true, this will run setup steps when the server starts
二、conf/hbase下 hbase-site.xml 配置
填写atlas安装对应路径
<configuration>
<property>
<name>hbase.rootdir</name>
<value>${url_prefix}${atlas_data}/hbase-root</value>
</property>
<property>
<name>hbase.zookeeper.property.dataDir</name>
<value>${atlas_data}/hbase-zookeeper-data</value>
</property>
<property>
<name><a href="http://hbase.master.info/">hbase.master.info</a>.port</name>
<value>61510</value>
</property>
<property>
<name><a href="http://hbase.regionserver.info/">hbase.regionserver.info</a>.port</name>
<value>61530</value>
</property>
<property>
<name>hbase.master.port</name>
<value>61500</value>
</property>
<property>
<name>hbase.regionserver.port</name>
<value>61520</value>
</property>
</configuration>
conf 目录下atlas-env.sh
添加hbase conf目录
export HBASE_CONF_DIR=/home/service/apache-atlas-2.1.0/conf/hbase
三、验证HA是否开启成功
配置完成后主机以及从机启动atlas
bin/目录下执行
./atlas_start.py
查看高可用是否成功
./atlas_admin.py -status
主机显示ACTIVE 状态
从机显示PASSIVE 状态
则成功